

Updated April 20, 2026
TL;DR: SPF, DKIM, and DMARC must be configured before any sending begins to protect sender reputation. Automated setup processes reduce per-client setup time significantly compared to manual DNS work. Our flat-fee unlimited inbox platform starts at $47/month on the Growth plan and saves agencies up to 99% compared to per-seat models when managing 50 or more inboxes.
Per-seat pricing compounds agency costs with every inbox you add. Poor DNS setup sends client campaigns to spam. A weak onboarding process means your team fixes avoidable configuration errors instead of booking meetings.
This guide gives you the exact client onboarding email templates for unlimited inboxes, plus technical checklists to connect domains, automate DNS verification, and protect sender reputation from day one.
Tailored onboarding for high-volume sending
Per-seat pricing is a direct tax on agency growth. Every inbox you add for a client raises your monthly bill on traditional tools. When you move to a flat-fee unlimited accounts model, the math flips entirely in your favor.
We based the competitor estimates below on publicly available per-user rates for professional-tier email outreach platforms:
Setup | Instantly Growth ($47/mo) | Typical per-seat tool (est. $79/seat/mo) | Estimated monthly savings |
|---|---|---|---|
10 inboxes | $47 | ~$790 | ~$743 (94%) |
50 inboxes | $47 | ~$3,950 | ~$3,903 (99%) |
150 inboxes | $47 | ~$11,850 | ~$11,803 (99%) |
At 20 inboxes, our flat-fee infrastructure costs 77% less than per-seat tools, as our pricing model analysis shows. See our full pricing breakdown for all plan tiers.
We also built inbox rotation into unlimited accounts, which distributes send volume across multiple addresses and protects any single inbox from hitting spam triggers.
Email authentication via DNS
Before any inbox sends a single email, three DNS records must be in place. These are the technical foundation of deliverability, and skipping any one of them is the fastest way to burn a client domain.
- SPF (Sender Policy Framework): A TXT record that tells receiving mail servers which servers can send email from your domain. Without it, your emails fail the first authentication check.
- DKIM (DomainKeys Identified Mail): A digital signature attached to every outgoing email, proving it was sent by an authorized server and was not tampered with in transit.
- DMARC: A policy layer that tells receiving servers what to do when SPF or DKIM fails. Google and Yahoo now require a valid DMARC record for bulk senders.
For a deeper look at how these records affect deliverability in active campaigns, our email deliverability guide for sequences covers the full technical stack.
Managing multiple inbox credentials
The most common confusion during agency onboarding is the IMAP and SMTP username format. Older email systems accepted just the part before "@", but modern providers including Google Workspace and Microsoft 365 require the full email address as the username in every case, for example: name@clientdomain.com.
Best practice: always collect and document the full email address and an app password (not the regular account password) for every inbox you connect. For Google Workspace, generate an app password through the Google account security settings. For Microsoft 365, follow our Azure app password setup guide. Store credentials in a password manager with client-level folders, and never send raw passwords in onboarding emails.
Client-side technical onboarding steps
The full onboarding sequence for a new client inbox protects both the client domain and your agency's sending infrastructure:
- Create the email account on Google Workspace or Microsoft 365 using the client's domain.
- Add SPF, DKIM, and DMARC records to the domain's DNS settings (covered in the templates below).
- Connect the inbox to our platform using OAuth or an app password via Settings > Email Accounts. Our email accounts getting started guide covers every step.
- Enable automatic warmup inside the platform before any campaign sends.
- Confirm authentication passes in your dashboard and run an inbox placement test before launching.
Our Done-For-You setup service automates domain registration and DNS configuration so your team handles less manual work per client. The step-by-step inbox connection guide walks through the full process visually.
Client setup for strong sender reputation
The first weeks after connecting a new client inbox determine how inbox providers score that domain for months. Rushing sends before warmup completes, or skipping authentication records, creates a reputation deficit that is slow to recover from and fast to create.
Pre-flight domain checklist
Run through this checklist before activating any new client domain. Combine the domain audit and authentication verification into one pass to save time:
- Check SPF: One TXT record only. Multiple SPF records cause DMARC failures. Consolidate all includes into a single record:
v=spf1 include:spf.instantly.ai include:_spf.google.com ~all - Check DKIM: Confirm the public key is published at
selector._domainkey.yourdomain.com. Verify the full 2048-bit key is present with no truncation or copy-paste errors. - Check DMARC: Confirm a
_dmarc.yourdomain.comTXT record exists. Start withp=noneto monitor without blocking. - Check domain age: Use a WHOIS lookup to confirm the domain's registration date. Domains less than 3 months old need a more conservative warmup ramp.
- Check blacklist status: Run the domain through MXToolbox's blacklist checker before connecting it to your infrastructure. A domain already on a blocklist needs remediation before it sends a single warmup email.
- Check existing send history: If the client has sent email from this domain before, check Google Postmaster Tools for any existing complaint or spam history. A prior spam complaint rate above 0.3% is a red flag.
Secure DNS for email sending
SPF tells Gmail and Outlook that we are an authorized sender. DKIM adds a cryptographic signature to every email, confirming it has not been altered. DMARC ties the two together and gives providers a clear instruction on what to do when something fails.
Publish SPF and DKIM records first, then wait at least 48 hours before enabling DMARC. Running DMARC too early, before the authentication records have propagated fully, can cause legitimate emails to fail. Use MXToolbox's email health check to verify all three records are resolving correctly before you mark the domain as ready.
Setting client workspace roles
Unlimited accounts mean you can add every client inbox without a pricing penalty, but you still need a consistent organization system to keep your workspace manageable:
- One workspace per client with a clear naming convention such as
ClientName_Domain. - Assign team roles so junior staff can manage sequences without accessing billing or account settings.
- Use inbox labels to tag accounts by client, campaign type, or domain age.
- Document app passwords in a shared secure vault, not in Slack or email threads.
Our email tracking implementation checklist gives a full 30-day rollout framework for team onboarding.
Welcome email template: account setup overview
Every minute your client spends guessing what to do next is a minute you spend answering support requests. A standardized welcome email sequence eliminates that back-and-forth and sets a professional tone from the first interaction.
Subject lines for account setup and access
Use these subject lines for your initial account setup emails:
[Client Name], your account is readyAction required: connect your inbox (2 minutes)Action required: verify your domain (5 minutes)Step 3: inbox warmup starts todayYour cold email infrastructure is live
Our cold email subject line checklist covers pre-send QA steps you can apply to onboarding emails as well as outreach sequences.
Your client's first login
Send the following using the subject line [Client Name], your account is ready:
Hi [Client Name],

Your account is ready. Over the next 5 days we'll complete three steps
to ensure primary inbox delivery:

1. Connect your email account (today)
2. Authenticate your domain (tomorrow)
3. Warm up your inbox (starts immediately, runs 30 days)

Log in here: [LOGIN_LINK]
Email: [ACCOUNT_EMAIL]
Temp password: [TEMP_PASSWORD] — change this on first login.

Questions? Reply to this email and we'll get back to you.

[Your Agency Name]
Onboarding setup timeline
Set these expectations with every new client at the start of the process:
Stage | Timeframe |
|---|---|
DNS records added | As soon as possible after account creation |
DNS propagation | 1 to 48 hours |
Full authentication verified | Typically 24 to 48 hours after record publication |
Warmup enabled | Once authentication is complete |
Initial warmup phase | 30 days recommended |
First campaign send (low volume only) | Day 15 if bounces stay under 1% |
Full volume campaigns | Day 31 and beyond |
The official email account readiness guide explains exactly when an account is cleared for live campaign sends.

Ensure deliverability: domain verification template
Send this the day after the welcome email using the subject line Action required: verify your domain (5 minutes):
Hi [Client Name],

Step 2 is here. To protect your sender reputation, we need to verify
ownership of [yourdomain.com] using three DNS records.
This takes about 5 minutes.

1. Log into your domain registrar (GoDaddy, Namecheap, Cloudflare, etc.)
2. Find "DNS Settings" or "Advanced DNS"
3. Add the three TXT records exactly as shown below

Once you've added them, click "Verify" in your dashboard.
DNS propagation typically takes 24 to 48 hours.

[Your Agency Name]
Configure your SPF record
SPF tells inbox providers which mail servers can send email from the client's domain. Add one TXT record to DNS settings:
- Host:
@(or the root domain) - Type: TXT
- Value:
v=spf1 include:spf.instantly.ai include:_spf.google.com ~all
One SPF record only. If your client also uses Salesforce, HubSpot, or other sending tools, add their SPF includes to this same record before the ~all flag. A domain with two separate SPF records will fail SPF checks and break DMARC alignment.
Configure DKIM for inbox success
DKIM adds a digital signature to every outgoing email, proving it came from an authorized server and was not modified in transit. Generate a key pair inside your email platform and publish the public key as a TXT record at selector._domainkey.yourdomain.com:
- Host:
google._domainkey(or the custom selector shown in your platform) - Type: TXT
- Value:
v=DKIM1; k=rsa; p=[PUBLIC_KEY]
Use a 2048-bit key. If your DNS registrar truncates the key because of character limits, split the p= value into two strings, each enclosed in quotation marks, per your registrar's multi-string TXT input. After publishing, wait 48 hours before enabling DMARC.
DMARC policies for client onboarding
Google and Yahoo now require DMARC for senders above 5,000 messages per day. Start with a monitoring policy during the first 30 days and use relaxed alignment to avoid false failures while clients test sending from subdomains or connected tools:
- Host:
_dmarc - Type: TXT
- Value:
v=DMARC1; p=none; rua=mailto:[email protected]; adkim=r; aspf=r
The p=none policy monitors authentication failures without blocking any email. After confirming SPF and DKIM pass consistently, move to p=quarantine and eventually p=reject to fully protect the domain.
Fix domain verification issues
Two problems cause the majority of failed verifications:
- Multiple SPF records: Combine all SPF entries into one TXT record. Confirm using MXToolbox's SPF lookup that only one record resolves.
- DKIM key truncation: Some DNS registrars cut long TXT values mid-key. If DKIM fails, split the key into two strings using the registrar's multi-string TXT input to preserve the full 2048-bit value.
Inbox connection and warmup email template
Send this once domain verification is confirmed, using the subject line Step 3: connect your inbox — warmup starts today:
Hi [Client Name],

Your domain is verified. Now it's time to connect your inbox
and enable automatic warmup.

Here's what happens next:
- You authorize us to access your inbox
- Warmup starts automatically using a network of 4.2M+ real accounts
- Sends ramp gradually over 30 days, building trust with inbox providers

To connect your inbox:
1. Log into your dashboard
2. Go to Settings > Email Accounts
3. Click "Connect Email"
4. Follow the OAuth or app password steps for your provider
5. Toggle "Enable Warmup" — this starts immediately

[Your Agency Name]
Step-by-step inbox setup (Google Workspace and Microsoft 365)
For Google Workspace:
- Log into the Google account linked to the sending inbox.
- Go to
myaccount.google.com> Security > How you sign in to Google. - Enable 2-Step Verification if not already active.
- Go to App Passwords and generate a new app password for "Mail."
- In your dashboard, go to Settings > Email Accounts > Connect Email > Google.
- Enter the full email address as the username, such as
name@clientdomain.com, and the app password. - Save and confirm the account shows as Connected.
For Microsoft 365:
- Log into the Microsoft admin center.
- Enable Modern Authentication (OAuth) for the tenant if not already active.
- Follow the Azure app password setup steps in our Help Center.
- In your dashboard, go to Settings > Email Accounts > Connect Email > Microsoft.
- Enter the full email address as the username and complete the OAuth prompt.
Use our warmup filter guide to keep warmup emails out of the client's regular inbox view during the warmup phase.
Protecting sender reputation: warmup
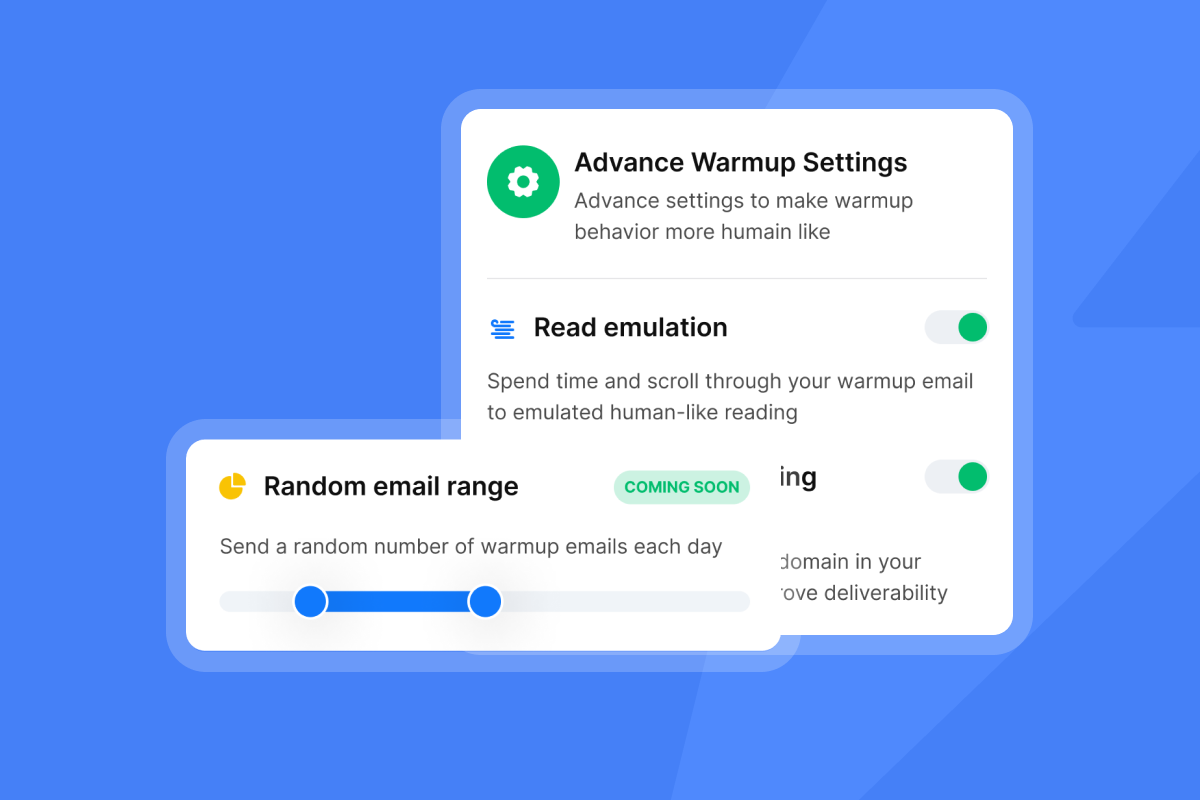
Warming up a new inbox before any real campaign sends is non-negotiable. Our built-in warmup uses a private deliverability network of 4.2M+ accounts to send and engage with warmup messages across real inboxes. This signals to Gmail, Outlook, and other providers that the sending address is legitimate and trustworthy.
The warmup system includes read emulation, reply simulation, and weekday-only sending options to produce a realistic engagement pattern. You can also use pre-warmed domains and accounts if a client needs to move faster than the standard 30-day ramp.
Users who follow this process consistently report strong deliverability outcomes:
"I appreciate Instantly for its intelligent handling of domain and mailbox rotation as well as provider matching, which is critical for ensuring that my emails land directly in the primary inbox instead of getting caught in spam filters." - Richard E. on G2
For a detailed visual walkthrough, the warmup setup video covers every toggle and option. The cold email deliverability guide from our channel covers warmup strategy in the context of a full outbound system.
Volume ramp for sender health
Cap every new inbox at 30 emails per day maximum. This is the hard limit that protects sender reputation at scale. Advance to the next week only if bounce rate stays under 1%:
Week | Daily sends per inbox |
|---|---|
Week 1 (Days 1-7) | 5 to 10 |
Week 2 (Days 8-14) | 10 to 20 |
Weeks 3-4 (Days 15-30) | 20 to 30 |
Day 31+ | 30 max |
Never scale a single inbox past 30 emails per day. If you need more volume, add more inboxes under the same flat-fee plan and use inbox rotation to distribute the load.
Track inbox deliverability health
Monitor these metrics weekly during and after warmup:
- Bounce rate: Keep at or below 1%. Anything above signals a list hygiene problem.
- Spam complaint rate: Keep below 0.3%. Google's bulk sender guidelines treat anything above 0.1% as a warning threshold.
- Inbox placement rate: Track this using our Inbox Placement tests, which confirm whether your emails are landing in the primary tab or being filtered to promotions or spam.
Our inbox placement automated tests guide explains how to set up and schedule regular health checks across all client domains.
Maintaining client email sender reputation
Once warmup is complete and campaigns are live, your ongoing responsibility is keeping sender reputation stable across all client inboxes.
Best send times for client emails
A common starting point for B2B outreach is a send window between 9 a.m. and 11 a.m. local time for the target audience's time zone. Most senders cap at 30 emails per inbox daily and stick to weekday business hours to protect sender reputation. A/B test your own send windows against this baseline, since optimal timing varies by industry and geography. Our subject line testing framework covers how to structure that testing rigorously.
Ensure primary inbox placement
After warmup completes, run an Inbox Placement test using our Inbox Placement tool to confirm emails are landing in the primary tab. The test sends a sample email to a seed list across major providers and returns a placement report by provider. Run this check before every new campaign launch and after any deliverability dip.
"I find Instantly incredibly efficient for email outreach as it saves a lot of my time... the email moment tool... significantly improves my communication with clients... protects my email reputation, ensuring that my outreach efforts are successful." - mohammad s. on G2
Setting up your unified inbox
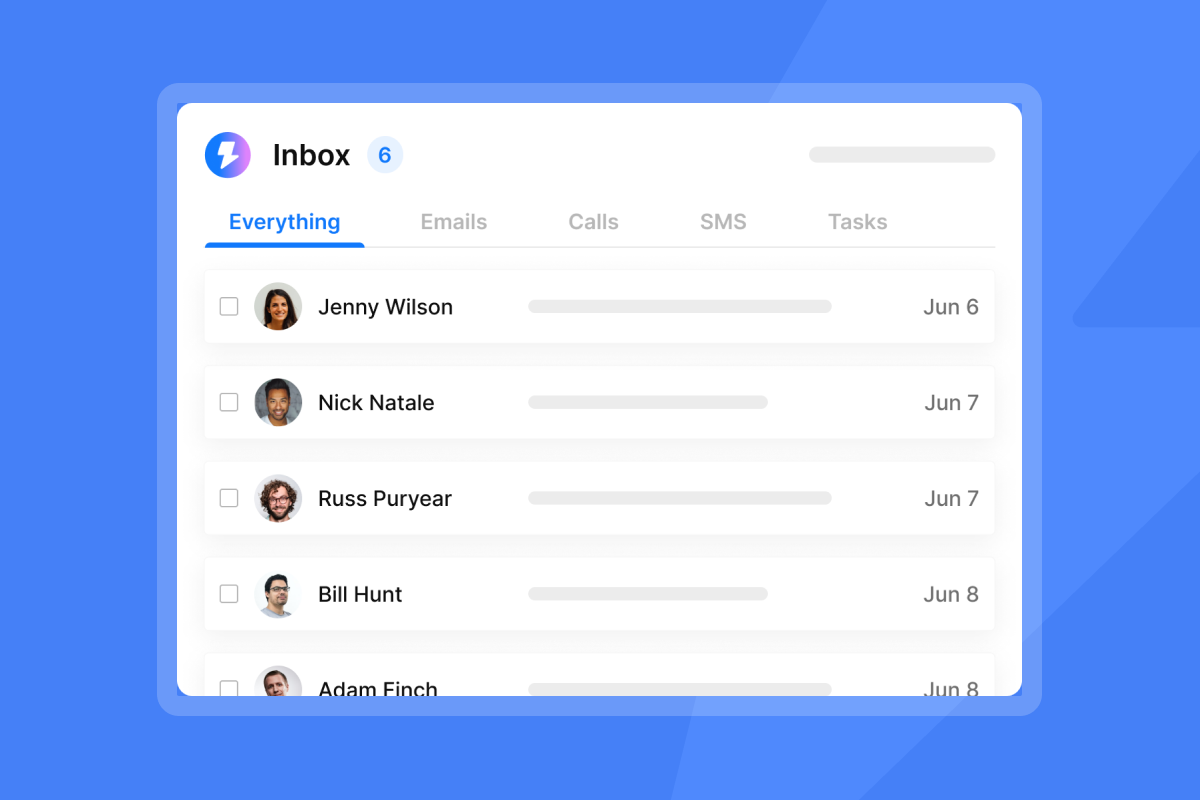
Managing replies across 10, 50, or 150 client inboxes without a centralized view means logging in and out of accounts constantly, missing positive replies, and losing deals in the noise. Our Unibox aggregates replies from every connected email account into one place, with AI labels that categorize replies as interested, not interested, or out-of-office automatically.
The Unibox lets your team handle reply management from a single dashboard without touching individual inboxes.
"The AI feature that reads replies and marks them as interested or not interested saves me a lot of time, making it easy to configure whom I need to focus on and reply to promptly." - Anurag k. on G2
"I like Instantly because it offers high deliverability, quick setup, and easy management of campaigns... I can add inboxes whenever I need at a low cost. This feature helps my campaigns run smoothly and on time, especially when I'm reaching out to larger volumes." - Josh R. on G2
Prevent email blacklisting
Think of list hygiene like a water filter. Dirty input poisons results over time, and you will not notice until the damage is done. Before uploading any contact list for a client campaign, scrub it against a verification tool to remove invalid, catch-all, and duplicate addresses. Use our catch-all email verification to identify risky addresses before they cause bounces.
If bounce rates pass 2%, pause the campaign immediately, re-verify the list, and restart at a lower send cap for three days before resuming normal volume.
Onboarding stuck? Quick fixes and solutions
Handling DNS propagation delays
DNS records can take anywhere from a few minutes to 48 hours to propagate globally, depending on the registrar's TTL (Time to Live) setting. TTL is the duration in seconds that DNS resolvers cache a record before checking for updates. Use MXToolbox's DNS lookup to confirm whether a record is visible from external resolvers. If a record is not visible after 48 hours, the problem is most likely a configuration error at your domain registrar, not a propagation delay.
Obtaining client inbox access
When a client goes quiet after the initial welcome email, send this follow-up using the subject line [Client Name], action required: inbox setup (5 min):
Hi [Client Name],

Following up on the inbox setup email from [DATE]. We need one action
from you to move forward: add the three DNS records to your domain
and generate an app password for your inbox.

The process takes under five minutes. Reply to this email and I can
walk you through it live in a 10-minute screen share if that's easier.

[Your Agency Name]
For a broader strategy on re-engaging unresponsive prospects, our follow-up guide covers timing, tone, and subject line structure.
Avoiding domain blacklists
The industry standard for properly warmed-up accounts is approximately 100 cold emails per day per inbox. Pushing volume beyond that limit increases the risk of triggering spam filters at the inbox provider level. If you need more throughput for a client, add more sending inboxes rather than overloading a single account. Our flat-fee pricing means adding 10 more inboxes costs nothing extra. The cold email system setup guide walks through scaling inbox volume without triggering provider-level blocks.
FAQs
How long does domain verification take?
DNS propagation typically completes within 24 to 48 hours, though some records resolve faster. Use MXToolbox's DNS checker to confirm all three records are resolving before marking verification complete.
Why does skipping warmup harm deliverability?
Sending cold campaigns from an unwarmed inbox signals to Gmail and Outlook that the address has no engagement history, which drives spam filter scores up immediately. Run at least 14 days of warmup before any live sends, and hold full campaign volume until Day 31.
How do I fix conflicting DNS records?
Multiple SPF records cause DMARC to fail outright because receiving servers cannot determine which record to validate against. Merge all SPF entries into a single TXT record and delete the duplicates. For DKIM failures, confirm the full public key is present at the correct subdomain with no truncation or formatting errors.
How many inboxes should a new client start with?
Start with two to three inboxes per client domain, as this is the standard recommended range for cold outreach. Google Workspace and Microsoft 365 domains typically reach stable inbox placement after 2 to 4 weeks of warmup, at which point you can scale to a full sending roster.
Start your free trial and use these onboarding templates to connect your first client domain today. You get unlimited email accounts, automated warmup across our 4.2M+ account network, and the Unibox for centralized replies, all from day one with no per-seat penalties.
Read Next
- Ultimate Guide to Cold Email Outreach
- Cold Email Deliverability Best Practices
- Email Warmup Guide: Protect Your Sender Reputation
Key terms glossary
SPF (Sender Policy Framework): A DNS TXT record that authorizes specific mail servers to send email on behalf of a domain. One record per domain only, since multiple SPF records cause authentication failures.
DKIM (DomainKeys Identified Mail): A cryptographic signature added to outgoing emails that lets receiving servers verify the message came from an authorized server and was not altered in transit.
DMARC: A DNS policy record that instructs receiving servers how to handle emails that fail SPF or DKIM checks. Required by Google and Yahoo for bulk senders.
IMAP (Internet Message Access Protocol): The protocol that lets your email client sync messages across multiple devices without removing them from the server. This is the standard for connecting inboxes to sending platforms.
Inbox rotation: Distributing outbound send volume across multiple email accounts to reduce load per inbox. This protects sender reputation and prevents any single address from hitting spam thresholds.
TTL (Time to Live): The duration in seconds that DNS resolvers cache a record before refreshing it. Lower TTL values speed up DNS propagation when you update records.


